Logs 'n Dogs
Chinking
"I thought this stuff was supposed to look like peanut butter"
Chinking was tedious. It was also tiresome, boring, monotonous, repetitious, and dull. The good news is that it wasn’t difficult. (And of course, if you select a chinkless method for your walls, this step isn’t needed.)
There are commercial chinking materials available, and installers with specialized extrusion equipment that can make short order of a chinking project. We used an old fashioned (and cheap) method that took time but worked fine.
There were three basic elements to our chinking process: Insulation, chicken wire and mortar.
Electrical Wiring, Etc.
One advantage of the construction method we used was that electrical conduit and other wiring could be run between the logs rather than exposed on the log surface. Before beginning any chinking work, we first ran wiring conduit between our wall logs to all locations where electrical outlets, switches, etc. were planned.

Blue conduit run between the logs for electrical wiring.
Chinking: "What a bore."
Insulation
We placed insulation material in our log walls, to help prevent the transfer of heat through the spaces between the wall logs. We used fiberglass batting, cut into strips, and shoved between the logs from both the inside and the outside.
Wire
To help hold in the insulation and also provide a backing for our mortar, we cut and stapled strips of chicken wire over the insulation material on both sides of the wall.
Mortar
Over the top of the chicken wire, we troweled a mortar mixture, to seal up the openings between the wall logs. Little of the mortar is actually in contact with the logs. The chicken wire holds it in place.

Chinking diagram.
Chinking: A serious lesson in patience.
Chicken wire held loose fiberglass insulation in place and provided a way for mortar to grip to the spaces between the logs.
A basic mortar recipe involves sand, cement, lime, and water. Using regular sand and cement, the mortar comes out gray, like concrete. We wanted ours to be white, so we used the following recipe:
-
6 parts white silica sand
-
2 parts Type I white Portland Cement
-
1 part lime
-
Water as needed to make workable mixture
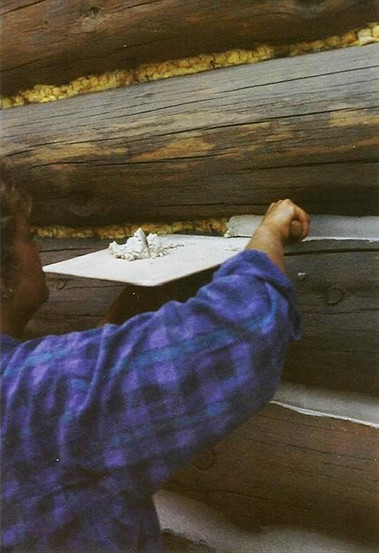
It took some experimenting to find the right amount of water for a workable consistency, like peanut-butter. If the mortar was too wet, it would slump out of the opening. Too dry, and it wouldn’t stick.
We found the fastest chinking method was to place our mortar on a plasterer’s mortar board (a flat square board with a handle on the bottom), hold the mortar board up to chicken wire between the wall logs, and then shove small amounts of mortar from the board onto the chicken wire with a 2-inch trowel.